


Did you know that a standard migration process takes 24-48 hours? Over the years, WordPress has grown from 13% in 2011 to powering more than 500 million (43%) in 2025. With 60% of site owners encountering WordPress migration issues like broken links, plugin conflicts, and database errors, achieving a successful migration requires the right information.
This comprehensive WordPress migration checklist will discuss everything you need to know for a smooth migration. Focusing on the website migration process, the best migration plugins like Duplicator, and how to migrate your WordPress site without hiccups. By following our ultimate WordPress migration checklist, you can ensure nothing goes wrong during the migration.

7 Best WordPress Store Locator Plugins for Local Business Visibility
By Festus Nkopuruk on July 22, 2025Key Takeaways
- Plan the entire migration before starting: Beginning the migration process involves backing up your WordPress files, updating your plugins, and conducting a WordPress database cleanup to ensure that the migration goes smoothly.
- DNS and SSL are very important: Configuring SSL and updating your DNS are essential for the smooth running of your website after the actual migration.
- Thoroughly test post-migration: After conducting manual migration, check the performance, front-end, links, and backend of your website to detect any issues that may arise.
- Maintain SEO and performance: Follow the ultimate WordPress site migration checklist to improve your website speed, SEO rankings, and user-friendliness for your visitors.
- Use a good hosting provider for Seamless Migration: A good hosting provider must offer free migration tools, 24/7 team support, optimized servers, and WordPress security to make the process hassle-free.
Table of Contents
- What is WordPress Migration?
- Why Website Migration Matters
- Pre-Migration Preparation Checklist for Your WordPress Site
- How to Migrate Your WordPress Website
- DNS Settings to Update After WordPress Migration
- WordPress Post-Migration Checklist
- SSL Configuration After Migration to Boost WordPress Security
- How to Perform Email, MX, and SMTP Checks After Migration
- How to Fix Common WordPress Migration Issues
- Final Thoughts on WordPress Migration Checklist
- FAQs
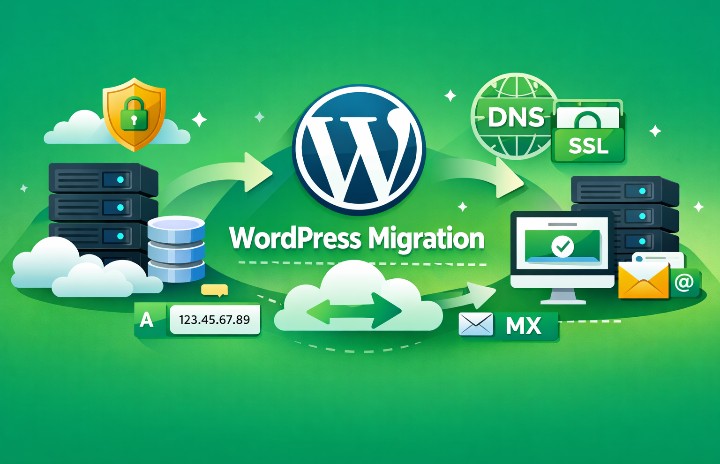
What is WordPress Migration?
WordPress migration is the process of transferring your website content from one environment to another. The migration process of WordPress hosting can involve moving your plugins, files, database, and plugins of your site to a new host. For example, using a WordPress migration process allows you to transfer your entire live site without losing functionality or design.

Your WordPress site Deserves faster hosting
Upgrade your website performance with Hostonce’s reliable WordPress hosting built for smooth migrations, better speed, security, and zero downtime.
Why Website Migration Matters
Website migration is essential for long-term business success because it affects the security, stability, and performance of your site. The following reasons illustrate the importance of site migration:
- Enhance the speed and performance of your site: Migration is great for websites with rising traffic that have outgrown their hosting solution and are looking for higher server resources. You can keep your WordPress site functioning better when you move to a new WordPress host.
- Strengthen Website Security: Outdated security configurations can leave your site vulnerable to DDoS attacks and malware. Migration allows you to use modern security features and prevent any attacks on your site.
- Ensure Better Hosting Reliability: When you move your site files and database to a reliable hosting provider, you are sure of getting optimized servers. Also, a secure WordPress installation, and other features are added to keep your site accessible.
- Scalability options for growth: As your website grows, there will be more demands to maintain optimal performance. With a WordPress migration tool, you can upgrade your hosting plan to VPS, add more server resources.
- Protect Your SEO: A smooth migration process allows you to maintain your WordPress SEO, fix broken links, and keep the sitemaps of your website without hurting your ranking on search engines.
- Offer a More Structured Website: The best time to clean up and back up your site is during migration. You can update your WordPress plugins like RankMath, uninstall outdated software, reorganize your files, and solve database issues to enhance performance.
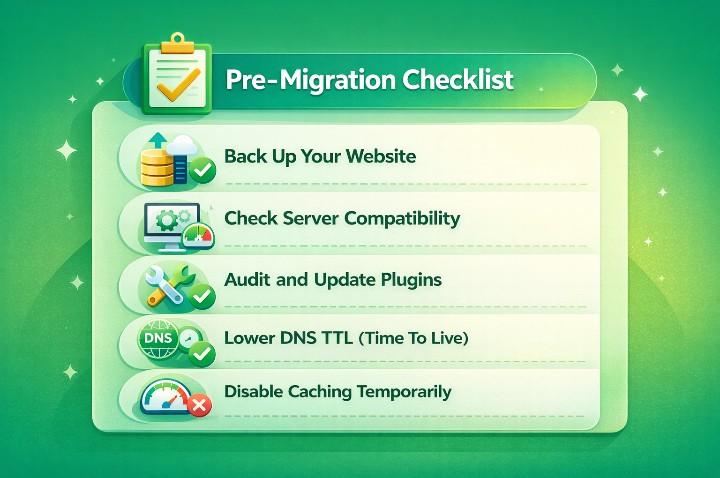
Pre-Migration Preparation Checklist for Your WordPress Site
Before you migrate a WordPress site, having a preparation checklist ensures that your data is safe and functional after migration. Also, we have listed out a quick WordPress migration checklist to consider before migrating your WordPress site to a new host.
- Back up your website: Before migrating a WordPress website, ensure that you have backed up your site to prevent data loss when things go wrong. You can back up the core files of your site, WP-content, MySQL database, and wp-config.php files.
- Check Server Compatibility: Plan your migration process by checking the server compatibility with the new host. You can check the storage limits, PHP version, extensions, HTTPS support, and memory to prevent any failure during migration.
- Fix Issues Before Migrating: Auditing your WordPress site before moving ensures that you don’t carry over any issues. You can look for broken links, theme errors, outdated plugins, and inconsistencies. A WordPress site requires careful planning for a smooth migration.
- Update WordPress Files: Outdated files can lead to more issues after migration. Updating your WordPress plugins, core files, and themes will ensure that your migration is completed successfully.
- Temporarily Disable Caching: Issues like broken links and white-screen can result from caching. Ensure that you have disabled LiteSpeed Cache, WP Super Cache, Cloudflare, and other tools to ensure optimal performance after migration.
- Lower Your DNS TTL (Time To Live): Before migration, lowering your DNS TTL can boost your DNS propagation. You can set your TTL to 300 seconds so that most website visitors can access your migrated site after switching DNS.
Hassle-free migration starts here
Switch to Hostonce today and enjoy completely free website migration. Our experts handle everything securely and smoothly, ensuring a faster WordPress experience from start to finish.
How to Migrate Your WordPress Website
Migration involves moving your site content without going offline or losing data. Whether you want to use a WordPress migration plugin or any migration method, here is how to successfully migrate your new WordPress site:
Step 1: Install a Reliable Migration Plugin
Using a reliable plugin is our first migration checklist for a smooth operation. You can use popular plugins like Duplicator, BlogVault, and All-in-One WP Migration. Go to the plugin section on your WordPress dashboard and install the plugin to get started.
Step 2: Export Your WordPress Site
After activating the plugin, you can export your WordPress site from it. All you have to do is select “Export Site” and download the entire website package. Note that some plugins use cloud services, like Google Drive, to store your WordPress backups.
Step 3: Prepare Your New Hosting Environment
Prepping your new environment is very important. You can install WordPress on the new hosting environment and activate the same plugin you used for migration. Hosting providers like Hostonce offer 1-click WordPress installation immediately after migration.
Step 4: Import Your Website Backup
To ensure that you do not have any errors that interfere with the migration process, use the migration plugin on your new website to import your backup. All you have to do is select “Import,” upload the backup data, and wait for the restoration to be successful. The plugin helps to replace your settings, files, and database after migration.
Step 5: Update Your Permalinks
A migrated site using outdated permalinks can lead to different 404 errors. Updating your permalinks changes your URL structure, and you can do this by going to Settings → Permalinks → Save Changes.
Step 6: Test Your Migrated WordPress Site
After performing a new WordPress installation, backup importation, and permalinks updating, testing your migrated site is the last step to take. To ensure that everything runs smoothly, check your homepage, contact forms, internal links, plugins, and other areas of your new site.
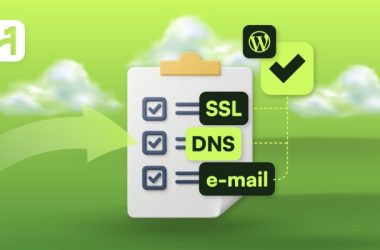
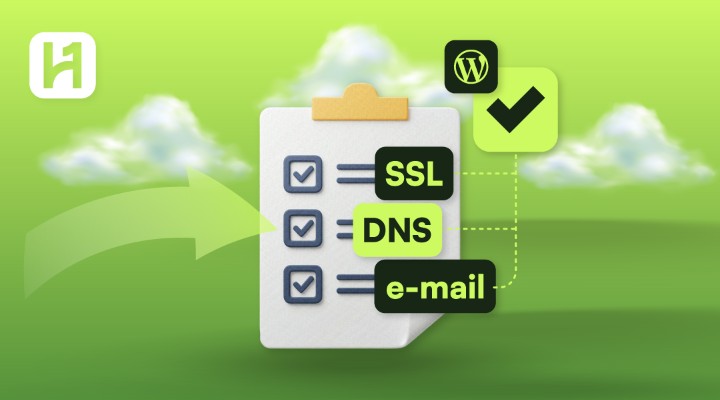
DNS Settings to Update After WordPress Migration
Outdated DNS settings can lead to certificate errors, broken pages, and downtime. In this section, we will discuss the major DNS records that must be updated after migration.
- Update the A Record: This is where you point your domain after migration. The A record blocks traffic to your old website and directs site visitors to your new site. You can update it to the IP address of your new server, provided by your domain provider.
- Update the CNAME Record for WWW: If the subdomain of your site uses a CNAME, ensure that your “WWW” is synchronized with the new setup. Doing this ensures that your “www.yourdomain.com” and “domain.com” give the new migrated site.
- Update MX Records if Email Runs on a Separate Provider: This is very important for users hosting their emails on a different provider. Updating your MX records will prevent mailbox downtime and delivery failures. For example, Hostonce domain users can update their MX records to the mail servers of the company.
- Update SPF, DKIM, and DMARC Records: These records are great for preventing spam, spoofing, and boosting email deliverability. Update your DMARC for anti-spoofing, SPF for mail servers, and DKIM for email signing.
- Update the CNAME Record for CDN or Cache Providers: For users on Bunny CDN and Cloudflare services, you can make your migration effective when you point the CDN CNAME record to the new hosting name.
- Update Nameservers: When you change your nameservers, it can take 24-48 hours to become active. The nameservers migration checklist is essential for site owners moving DNS management to a new host. Ensure that you configure the domain registrar of your site to the new environment.
WordPress Post-Migration Checklist
Having a WordPress post-migration checklist is perfect for discovering any issues and ensuring optimal performance on the new host. To prevent downtime after you have moved your WordPress site, you can follow this checklist:
- Verify Your Domain Points to the New Server: Ensure that the DNS records holding your CNAME, A-Records, and MX are updated correctly. Additionally, you can use WordPress tools like WhatsMyDNS and DNS checker to verify your domain points.
- Thoroughly Test the WordPress Frontend: Visit your website in incognito mode to check how it performs. Also, check the different pages of your site, internal links, media files, and other areas to ensure that everything is working perfectly.
- Test the WordPress Admin Dashboard: Log into the backend of your WordPress site to look for any errors that may be lurking. You can check the speed of your dashboard, plugin appearance, and any login issues after migration.
- Validate Permalinks and URL Structure: Migration may sometimes lead to permalinks being broken. Furthermore, confirm your URL structure from your settings and save any changes to fix routing and .htaccess.
- Reconfigure SSL Certificate (HTTPS): You can reinstall your SSL certificate if you notice that it wasn’t migrated. Additionally, confirm that your SSL certificate is active on your WordPress version, there are no warnings for mixed content, and HTTPS redirects are correct.
- Update wp-config.php Settings: For smooth performance, your WordPress configuration should match your new server. Also, make sure that the database name, username, and password are correct.
SSL Configuration After Migration to Boost WordPress Security
Having an incorrect HTTPS configuration can lead to broken links and mixed-content errors. Furthermore, to prevent any SSL issues after migration, ensure that you:
- Install or Reissue Your SSL Certificate: For users who lost their SSL certificate after migration, you’ll be required to install another one on the new server. You can do this by linking the certificate to the new domain or enabling free SSL from your control panel dashboard.
- Enable HTTPS Across Your Website: After successful SSL installation, enforce HTTPS across your site to redirect traffic automatically to your new host. You can achieve this by clicking “Force HTTPS” from your hosting dashboard, updating your .htaccess file, or using a WordPress plugin such as Really Simple SSL.
Quick Tip
This WordPress post-migration checklist helps you identify and fix common migration issues like SSL errors, broken links, DNS delays, and email problems. This helps to ensure that you have a website launch that is smooth, fully functional, and safe.
- Fix Mixed Content Errors: These types of errors occur when your website is using HTTPS and HTTP resources to load. In addition, you can solve it by clearing web caches, updating your image paths, and using a search-replace WordPress tool like Better Search Replace.
- Update CDN, Cache, or Proxy Settings: Website owners who are using Cloudflare or CDN can easily update the SSL settings. Also, look for CDN origin URL, SSL mode, and cached HTTP assets from the dashboard.
- Regenerate and Test Your Sitemap: After configuring your settings to HTTPS, ensure that your sitemap shows the encrypted URLs. Furthermore, you can use WordPress SEO tools like RankMath to regenerate the sitemap or submit the new sitemap to Google Search Console.
Turn visitors into buyers with better hosting
Hostonce ecommerce hosting gives your store the power to grow without limits. Experience fast load times, secure transactions, and optimized WordPress performance to boost conversions and satisfaction
How to Perform Email, MX, and SMTP Checks After Migration
Email, MX, and SMTP configurations are essential for the smooth functioning of your newsletters, contact forms, emails, and order alerts. Additionally, here is how to perform the correct checks after migration:
- Verify Your MX Records: MX stands for Mail Exchange, and it shows the server managing the email hosting of your domain. After migrating to a new host, you can verify your MX records by logging into your DNS panel and ensuring that the MX records are pointing to your new provider. Furthermore, incorrect configuration can result in emails bouncing.
- Check SPF, DKIM, and DMARC Records: Thanks to DNS records, your emails can be authenticated and delivered successfully. In addition, it is essential to use tools like MXToolbox to check your SPF, DKIM, and DMARC records after migrating your site.
- Test SMTP Settings in WordPress: Most WordPress websites use SMTP to send emails to boost reliability. In addition, you can test your SMTP Settings by confirming the port, host, password, and username. You can also use WP Mail SMTP to test emails and contact forms.
- Monitor Email Deliverability: With tools like MailTester, you can monitor the email deliverability of your site for 48 hours. Furthermore, doing this will ensure that the emails you send are reaching the right audience and there are no bounce-backs.
- Configure Any Hardcoded Email Addresses: Some custom code and plugins may contain hardcoded email addresses. Additionally, it is essential to update your admin emails, notification addresses, and contact form recipients.
How to Fix Common WordPress Migration Issues
There are issues that may be introduced during the migration process. Whether you’re ready to migrate your WordPress site or not, understanding these common issues can save you time, money, and effort. Below is a guide on how to fix common migration issues in WordPress:
1. White Screen of Death (WSOD)
A common issue that is usually caused by plugin conflicts, a corrupt wp-config.php, and a PHP memory limit. You can fix the WSOD by deactivating every plugin on your site and increase the memory limit of your PHP
2. Broken Links and Missing Images
These types of errors usually show symptoms like media files not showing correctly and internal links connecting to old domains. It is caused by using the wrong database URLs and not completing the migration of the /wp-content/uploads/ folder. Also, you can solve these errors, clear your website caches after updating your URLs, and check that all your media files are found in the /wp-content/uploads/
3. Database Connection Errors
Errors leading to database connection are caused by using the wrong database information in wp-config.php or the database server shutting down. You can fix this by using the right optimization techniques and contacting your domain customer service for assistance during server downtime.
Expert Tip
After migration, always verify SSL activation, update permalinks, and clear all caches to prevent broken links and mixed content errors. Also, you can test your DNS propagation and email deliverability thoroughly to keep your WordPress site running smoothly and securely.
4. Plugin or Theme Conflicts
Symptoms like admin pages not loading and layout issues are caused by plugin or theme conflicts. Moreover, ensure that all your plugins or themes are the latest version, use the WordPress default theme, and activate PHP compatibility settings from your hosting dashboard.
5. Mixed Content Warnings
When you see mixed content warnings like “Not Secure” and an HTTPS padlock missing, know that there are hardcoded links in your plugin or theme files. Furthermore, you can use Better Search Replace to update your URLS, force HTTPS redirects, and remove caching plugins.
Final Thoughts on WordPress Migration Checklist
Website migration is an intricate part of maintaining optimal performance and security monitoring all the time. From pre-migration stages to post-migration, we have discussed the necessary steps for ensuring a smooth transition to a new hosting provider. Also, performing a successful migration can prevent downtime and protect your website from future threats. By sticking to the various checklists listed in this article, you can be sure of getting the right result for your site and solving any issues that may arise.
FAQs
How can I prevent WordPress migration issues during my site move?
You can prevent WordPress migration issues by creating a full backup, updating plugins and themes, verifying server compatibility, lowering DNS TTL, and testing your site thoroughly after migration. Using reliable tools like Hostonce’s migration services also ensures a smoother process.
Will WordPress migration issues affect my SEO?
Yes. Broken links, downtime, and incorrect redirects caused by migration issues can negatively impact your SEO rankings. Ensuring proper URL updates, sitemap submissions, and thorough post-migration testing preserves your search visibility.
How long does a WordPress site migration usually take?
Migration time depends on your site size, server speed, and method. Small sites can migrate in under an hour, while larger or complex sites may take several hours. Using a migration plugin or managed hosting service like Hostonce can speed up the process.
Do I need to update SSL and DNS after migrating my WordPress site?
Yes. After migration, you must update DNS records to point to the new server and configure SSL to ensure HTTPS is working. This step prevents security warnings, downtime, and email delivery issues.
Free vs Premium WordPress Themes: Which One Is Best for Your Business
By Favour Brown on April 26, 2026
Hostonce is the #1 WordPress Host
Ranked by 930+ customers in G2's Best Software Awards.